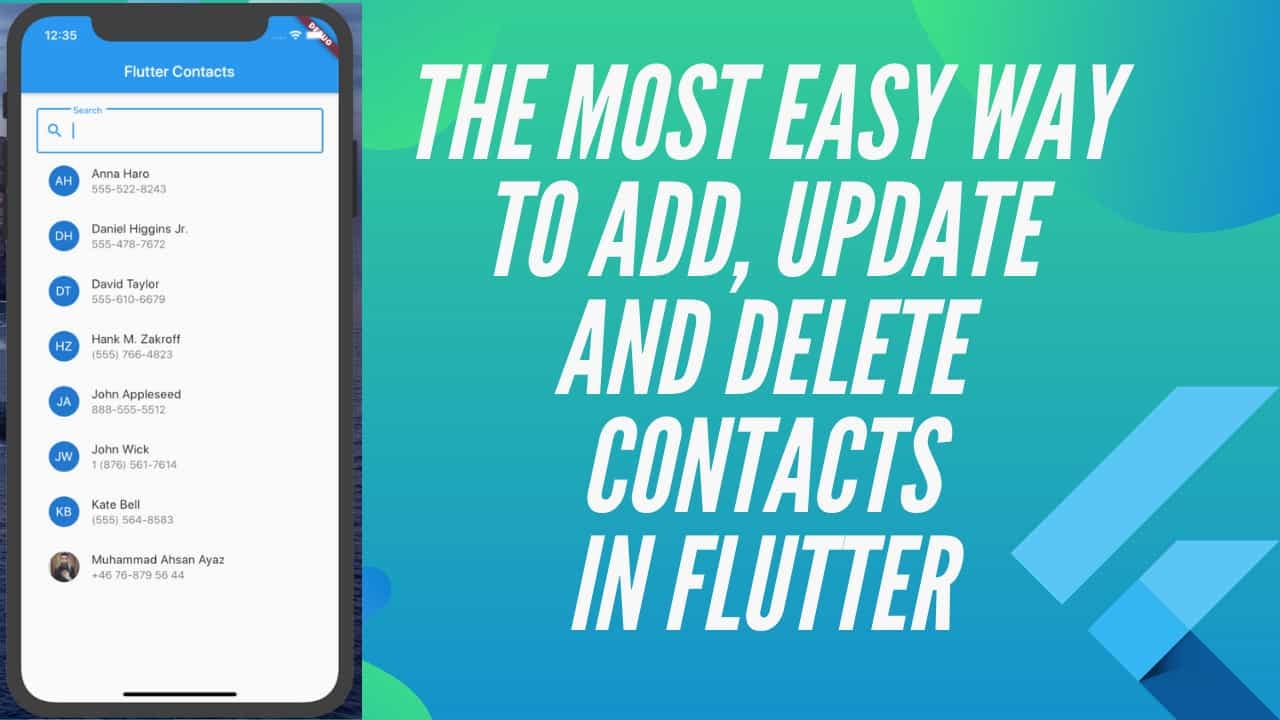
The MOST EASY WAY to Add, Update and Delete contacts in Flutter
- Authors
- Name
- Muhammad Ahsan Ayaz
- @codewith_ahsan


- Posted on
- Posted on
In this article, you'll learn the most easiest ways to implement Adding, Updating and Deleting contacts in a Flutter app. And we'll do it using the ContactsService Flutter package. So hold your horses, and hang tight!
Prerequisites
In order to follow this article, you need to be familiar with Flutter. I.e. should have the basic understanding of how Flutter works. You should also have the tooling set up for developing for either Android or iOS. See the Get started section on the official docs.
Let the game begin
First of all, you have to clone the GitHub repository for the project. So open your terminal/command prompt and run the following command
git clone https://github.com/AhsanAyaz/flutter_contacts_list.git
Now, checkout the feat/add-delete-contacts-start branch by running the
following command:
git checkout feat/add-delete-contacts-start
Great! Open the project in your favorite editor now. I mainly use Android Studio or VSCode these days for Flutter.
📲 Once you've opened the code, run the app on either Android or iOS simulator. For this example, I'm going to use Android. Follow the instructions to run the app on your simulator based on your IDE/environment.
Adding a Contact
Let's add a floating button in our Flutter app that we'll use to add a new
contact. To do so, update the main.dart file's build() method as follows:
@override
Widget build(BuildContext context) {
  bool isSearching = searchController.text.isNotEmpty;
  bool listItemsExist = (
      (isSearching == true && contactsFiltered.length > 0) ||
      (isSearching != true && contacts.length > 0)
  );
  return Scaffold(
    appBar: AppBar(
      title: Text(widget.title),
    ),
    floatingActionButton: FloatingActionButton(
      child: Icon(Icons.add),
      backgroundColor: Theme.of(context).primaryColorDark,
      onPressed: () {
        ContactsService.openContactForm();
      },
    ),
    body: Container(
      padding: EdgeInsets.all(20),
      child: Column(
        children: <Widget>[...],
      ),
    ),
  );
}
With the above change in place, you should be able able to see the floating action button. And when you tap it, you should see the Native contact form opened as follows:
Although the above is great progress in just one step, we have an issue. If you look at the Flutter's terminal/logs, you'll notice that as soon as you close the contact form without entring anything, it throws a bunch of errors as follows:
E/flutter (20582): [ERROR:flutter/lib/ui/ui_dart_state.cc(177)] Unhandled Exception: FormOperationException: FormOperationErrorCode.FORM_OPERATION_CANCELED
E/flutter (20582): #0      ContactsService._handleFormOperation (package:contacts_service/contacts_service.dart:129:11)
E/flutter (20582): #1      ContactsService.openContactForm (package:contacts_service/contacts_service.dart:97:11)
E/flutter (20582): <asynchronous suspension>
E/flutter (20582):
D/EGL_emulation(20582): eglCreateContext: 0xf104cfe0: maj 3 min 0 rcv 3
Notice the error code FormOperationErrorCode.FORM_OPERATION_CANCELED. This is
fired from the library in case the operation is cancelled by the user. There are
few other errors as well to handle, and the appropriate way is to use a try
catch around the openContactForm() method's usage. Update the main.dart as
follows:
@override
Widget build(BuildContext context) {
  ...
  return Scaffold(
    appBar: AppBar(
      title: Text(widget.title),
    ),
    floatingActionButton: FloatingActionButton(
      child: Icon(Icons.add),
      backgroundColor: Theme.of(context).primaryColorDark,
      onPressed: () async {
        try {
          await ContactsService.openContactForm();
        } on FormOperationException catch (e) {
          switch (e.errorCode) {
            case FormOperationErrorCode.FORM_OPERATION_CANCELED:
            case FormOperationErrorCode.FORM_COULD_NOT_BE_OPEN:
            case FormOperationErrorCode.FORM_OPERATION_UNKNOWN_ERROR:
              print(e.toString());
              break;
          }
        }
      },
    ),
    body: Container(...),
  );
}
With the above change, the errors should be gone now. 🙌 Hurray! However, what happens if we actually save a new contact? So far we have nothing in place for the scenario, and ideally, we should be reloading all the contacts as soon as we save a new contact.
"Sorry what? Reloading all contacts? Why Ahsan?"

Glad you asked. The reason is the way the ContactsService fetches the contacts
from the device. It fetches it sorted by the givenName property of each
contact. Now if you added a contact and wanted to just push it to the list,
where would you push it? To the top? Bottom? Or will you sort the entire
contacts list?
To avoid this complexity, it is just way easier to reload the contacts in this
case. And to do so, modify the main.dart as folows:
@override
Widget build(BuildContext context) {
  ...
  return Scaffold(
    appBar: AppBar(
      title: Text(widget.title),
    ),
    floatingActionButton: FloatingActionButton(
      child: Icon(Icons.add),
      backgroundColor: Theme.of(context).primaryColorDark,
      onPressed: () async {
        try {
          Contact contact = await ContactsService.openContactForm();
          if (contact != null) {
            getAllContacts();
          }
        } on FormOperationException catch (e) {
          switch (e.errorCode) {
            case FormOperationErrorCode.FORM_OPERATION_CANCELED:
            case FormOperationErrorCode.FORM_COULD_NOT_BE_OPEN:
            case FormOperationErrorCode.FORM_OPERATION_UNKNOWN_ERROR:
              print(e.toString());
              break;
          }
        }
      },
    ),
    body: Container(...),
  );
}
Viewing a Contact
To view a contact's details, we already have a widget as a page, called
ContactDetails. The file's path is lib/pages/contact-details.dart. We need
to navigate to this page/widget whenever the user taps any contact. To do so,
modify the lib/components/contacts-list.dart as follows:
import 'package:contacts_app/app-contact.class.dart';
import 'package:contacts_app/pages/contact-details.dart';
...
class ContactsList extends StatelessWidget {
  ...
  @override
  Widget build(BuildContext context) {
    return Expanded(
      child: ListView.builder(
        ...
        itemBuilder: (context, index) {
          AppContact contact = contacts[index];
          return ListTile(
            onTap: () {
              Navigator.of(context).push(MaterialPageRoute(
                builder: (BuildContext context) => ContactDetails(
                  contact,
                  onContactDelete: (AppContact _contact) {

                  },
                  onContactUpdate: (AppContact _contact) {

                  }
                )
              ));
            },
            title: Text(contact.info.displayName),
            ...
          );
        },
      ),
    );
  }
}
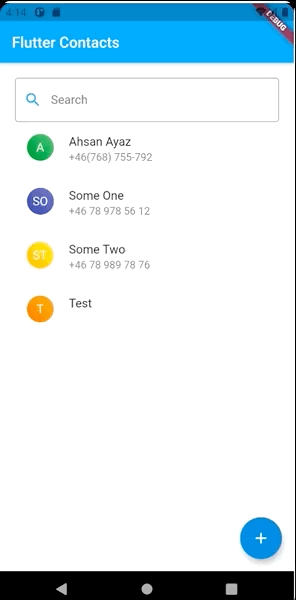
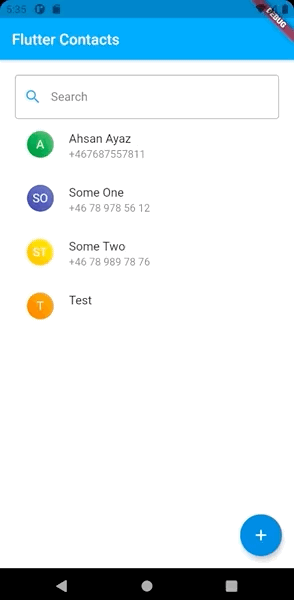
If you now try tapping on any of the list items on the home page, you should see it working as follows:

Updating a Contact
To update the contacts, we need to implement a PopupMenuButton widget inside
the ContactDetails page widget. We'll create a list of actions ('Edit' and
'Delete') and will then create a PopupMenuButton with some PopupMenuItem
widgets. Your code in the lib/pages/contact-details.dart file should look as
follows:
class _ContactDetailsState extends State<ContactDetails> {
  @override
  Widget build(BuildContext context) {
    List<String> actions = <String>[
      'Edit',
      'Delete'
    ];
    return Scaffold(
      body: SafeArea(
        child: Column(
          children: <Widget>[
            Container(
              height: 180,
              decoration: BoxDecoration(color: Colors.grey[300]),
              child: Stack(
                alignment: Alignment.topCenter,
                children: <Widget>[
                  Center(child: ContactAvatar(widget.contact, 100)),
                  Align(...),
                  Align(
                    alignment: Alignment.topRight,
                    child: Padding(
                      padding: EdgeInsets.all(8.0),
                      child:  PopupMenuButton(
                        itemBuilder: (BuildContext context) {
                          return actions.map((String action) {
                            return PopupMenuItem(
                              value: action,
                              child: Text(action)
                            );
                          }).toList();
                        },
                      ),
                    ),
                  )
                ],
              ),
            ),
            Expanded(...)
          ],
        ),
      ),
    );
  }
}
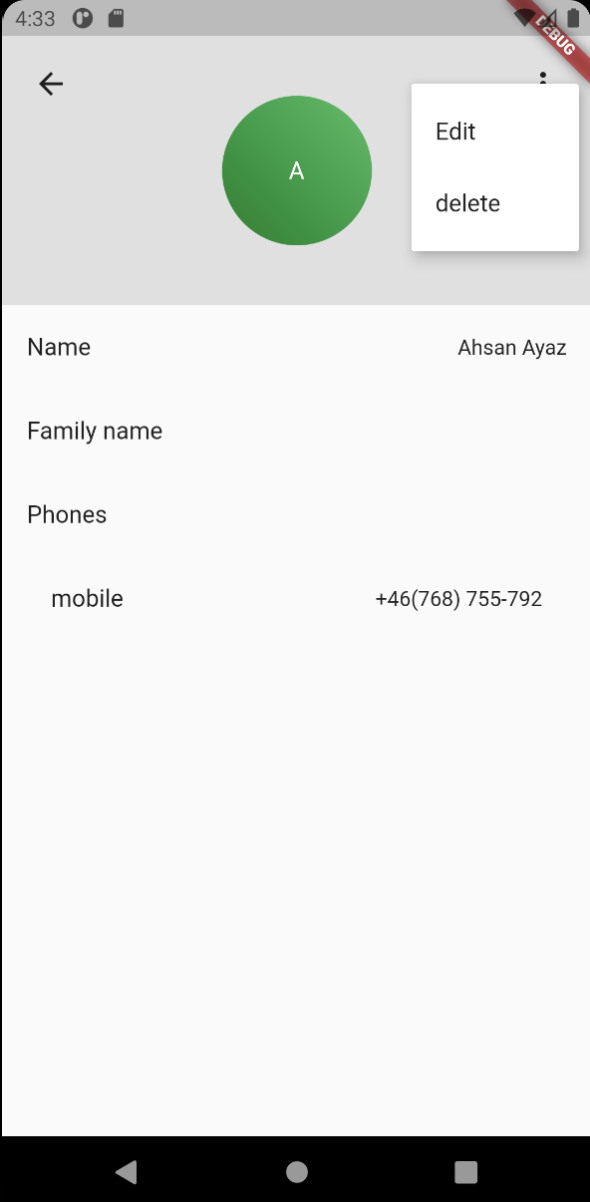
When you've implemented the code above, you should see the PopupMenuButton
widget appear on the top right corner of the ContactDetails page as follows:
Let's implement what happens if we press the Edit action. We want to be able
to open an existing contact for editing. And when we have edited the contact, we
need to reflect it on the ContactDetails page as well. For this, we'll create
a method called onAction in our ContactDetails widget and pass it to the
Modify the contact-details.dart as follows:
import 'package:contacts_app/app-contact.class.dart';
import 'package:contacts_app/components/contact-avatar.dart';
import 'package:contacts_service/contacts_service.dart';
...
class _ContactDetailsState extends State<ContactDetails> {
  @override
  Widget build(BuildContext context) {
    List<String> actions = <String>[
      'Edit',
      'delete'
    ];
    onAction(String action) async {
      switch (action) {
        case 'Edit':
          try {
            Contact savedContact = await ContactsService.openExistingContact(
              widget.contact.info
            );
            setState(() {
              widget.contact.info = savedContact;
            });
          } on FormOperationException catch (e) {
            switch (e.errorCode) {
              case FormOperationErrorCode.FORM_OPERATION_CANCELED:
              case FormOperationErrorCode.FORM_COULD_NOT_BE_OPEN:
              case FormOperationErrorCode.FORM_OPERATION_UNKNOWN_ERROR:
                print(e.toString());
                break;
            }
          }
          break;
        case 'Delete':
          break;
      }
    }

    return Scaffold(
      body: SafeArea(
        child: Column(
          children: <Widget>[
            Container(
              height: 180,
              decoration: BoxDecoration(color: Colors.grey[300]),
              child: Stack(
                alignment: Alignment.topCenter,
                children: <Widget>[
                  Center(child: ContactAvatar(widget.contact, 100)),
                  Align(...),
                  Align(
                    alignment: Alignment.topRight,
                    child: Padding(
                      padding: EdgeInsets.all(8.0),
                      child:  PopupMenuButton(
                        onSelected: onAction,
                        itemBuilder: (BuildContext context) {
                          return actions.map((String action) {
                            return PopupMenuItem(
                              value: action,
                              child: Text(action)
                            );
                          }).toList();
                        },
                      ),
                    ),
                  )
                ],
              ),
            ),
            Expanded(...)
          ],
        ),
      ),
    );
  }
}
If you try updating any contact now, you'll see that upon saving the contact, it
instantly updates the ContactDetails widget to show the updated value as
follows:
Reloading contacts after update
If we get back to the home (Contacts List) page after updating a contact at the moment, we don't see the updated contact's value there. We still see the old data. This is because we need to reload the contacts after updating or deleting a contact as well. To do this, we need to do the following:
- Call the
onContactUpdate()method from theContactDetailswidget after the contact has been updated. - From the
onContactUpdatecallback, we need to somehow reload all contacts (executing some callback in themain.dart). - In order to achieve the approach in step
2., we need to create an input method in theContactsListwidget namedreloadContacts()that we can pass a callback from themain.dart.
First, go to the contact-details.dart file and call the onContactUpdate()
method as follows:
...
class _ContactDetailsState extends State<ContactDetails> {
  @override
  Widget build(BuildContext context) {
    ...
    onAction(String action) async {
      switch (action) {
        case 'Edit':
          try {
            Contact savedContact = await ContactsService.openExistingContact(
              widget.contact.info
            );
            setState(() {
              widget.contact.info = savedContact;
            });
            widget.onContactUpdate(widget.contact);
          } on FormOperationException catch (e) {
            switch (e.errorCode) {
              case FormOperationErrorCode.FORM_OPERATION_CANCELED:
              case FormOperationErrorCode.FORM_COULD_NOT_BE_OPEN:
              case FormOperationErrorCode.FORM_OPERATION_UNKNOWN_ERROR:
                print(e.toString());
                break;
            }
          }
          break;
        case 'Delete':
          break;
      }
    }

    return Scaffold(...);
  }
}
Now let's modify the ContactsList widget to create the reloadContacts()
callback's property, and call it in both the onContactDelete and
onContactUpdate methods as follows:
...
class ContactsList extends StatelessWidget {
  final List<AppContact> contacts;
  final Function reloadContacts;
  ContactsList({Key key, this.contacts, this.reloadContacts}) : super(key: key);
  @override
  Widget build(BuildContext context) {
    return Expanded(
      child: ListView.builder(
        ...
        itemBuilder: (context, index) {
          AppContact contact = contacts[index];
          return ListTile(
            onTap: () {
              Navigator.of(context).push(MaterialPageRoute(
                builder: (BuildContext context) => ContactDetails(
                  contact,
                  onContactDelete: (AppContact _contact) {
                    reloadContacts();
                  },
                  onContactUpdate: (AppContact _contact) {
                    reloadContacts();
                  }
                )
              ));
            },
            ...
          );
        },
      ),
    );
  }
}
Finally, go to the main.dart and pass a callback as the reloadContacts
property the ContactsList widget. And call the getAllContacts method from
the callback as follows:
...
class _MyHomePageState extends State<MyHomePage> {
  ...
  @override
  Widget build(BuildContext context) {
    ...
    return Scaffold(
      appBar: AppBar(...),
      floatingActionButton: FloatingActionButton(...),
      body: Container(
        padding: EdgeInsets.all(20),
        child: Column(
          children: <Widget>[
            Container(...),
            contactsLoaded == true ?  // if the contacts have not been loaded yet
              listItemsExist == true ?  // if we have contacts to show
              ContactsList(
                contacts: isSearching == true ? contactsFiltered : contacts,
                reloadContacts: () {
                  getAllContacts();
                },
              ) : Container(...) :
            Container(...)
          ],
        ),
      ),
    );
  }
}
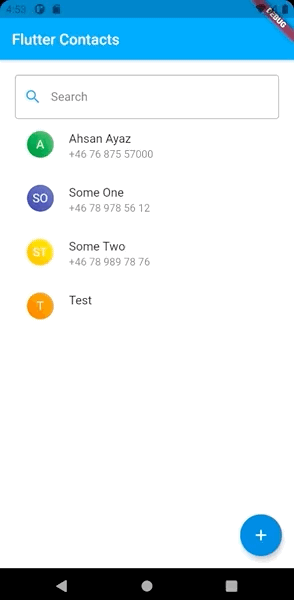
Once you've completed all the above steps, you should see that when you update
the contact, you immediately see the change in the ContactDetails page widget.
As well as on the ContactsList widget as follows:
Deleting a Contact
Deleting data of any sort is no joke. We have to be sure that the user wants to
delete the contact. We'll implement a confirmation dialog using the
AlertDialog widget.
Go to the contact-details.dart and create a new method named
showDeleteConfirmation(). Your code should look as follows:
...
class _ContactDetailsState extends State<ContactDetails> {
  @override
  Widget build(BuildContext context) {
    List<String> actions = <String>[
      'Edit',
      'Delete'
    ];

    showDeleteConfirmation() {
      Widget cancelButton = FlatButton(
        child: Text('Cancel'),
        onPressed: () {
          Navigator.of(context).pop();
        }
      );
      Widget deleteButton = FlatButton(
        color: Colors.red,
        child: Text('Delete'),
        onPressed: () {

        },
      );
      AlertDialog alert = AlertDialog(
        title: Text('Delete contact?'),
        content: Text('Are you sure you want to delete this contact?'),
        actions: [
          cancelButton,
          deleteButton
        ],
      );
      showDialog(
        context: context,
        builder: (BuildContext context) {
          return alert;
        }
      );
    }

    onAction(String action) async {
      switch (action) {
        case 'Edit':
          try {...}
          on FormOperationException catch (e) {...}
          break;
        case 'Delete':
          showDeleteConfirmation();
          break;
      }
    }

    return Scaffold(...);
  }
}
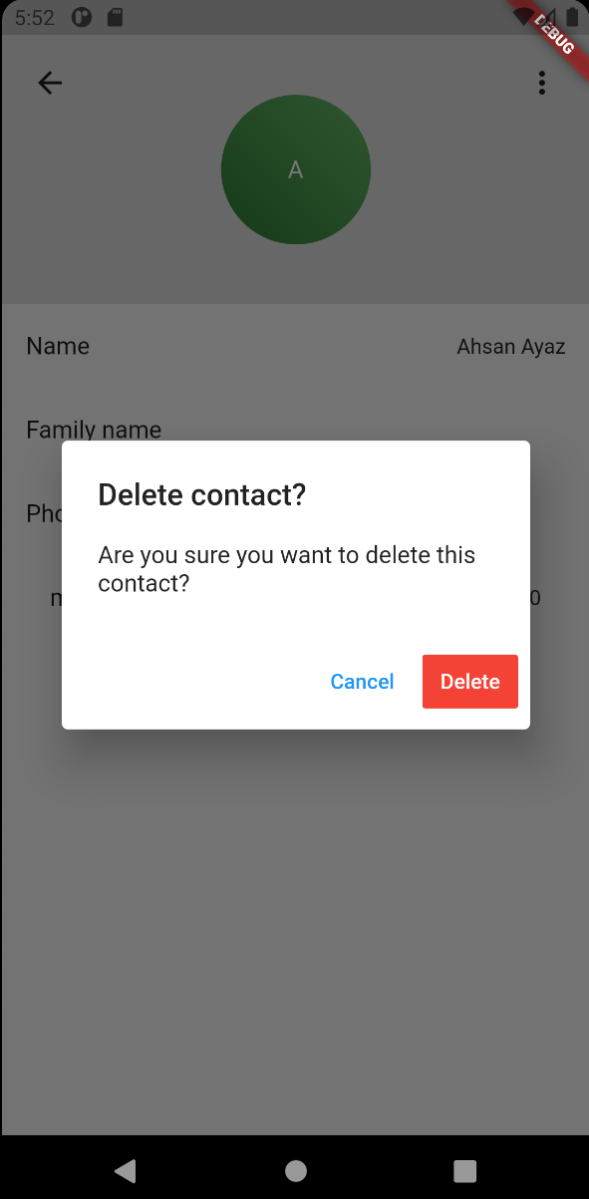
After you've implemented the above code, you should see the AlertDialog when
you tap the delete option, as follows:
Finally, we'd like to do the following on the tapping the Delete option:
- Delete the contact using the
ContactService'sdeleteContact()method. - Dismiss the
AlertDialogwidget. - Navigate from the
ContactDetailspage back to theContactsList(Home) page. - Reload the contacts which should remove the deleted contacts from the list.
Alright, let's do it! First, update the contact-details.dart as follows:
...
class _ContactDetailsState extends State<ContactDetails> {
  @override
  Widget build(BuildContext context) {
    ...
    showDeleteConfirmation() {

      Widget cancelButton = FlatButton(...);

      Widget deleteButton = FlatButton(
        color: Colors.red,
        child: Text('Delete'),
        onPressed: () async {
          await ContactsService.deleteContact(widget.contact.info);
          widget.onContactDelete(widget.contact);
          Navigator.of(context).pop();
        },
      );

      AlertDialog alert = AlertDialog(...);

      showDialog(...);
    }

    onAction(String action) async {...}

    return Scaffold(...);
  }
}
Now, go to the contacts-list.dart and update it as follows to implement a
.pop() inside the onContactDelete() callback:
...
class ContactsList extends StatelessWidget {
  ...
  @override
  Widget build(BuildContext context) {
    return Expanded(
      child: ListView.builder(
        ...
        itemBuilder: (context, index) {
          AppContact contact = contacts[index];
          return ListTile(
            onTap: () {
              Navigator.of(context).push(MaterialPageRoute(
                builder: (BuildContext context) => ContactDetails(
                  contact,
                  onContactDelete: (AppContact _contact) {
                    reloadContacts();
                    Navigator.of(context).pop();
                  },
                  onContactUpdate: (AppContact _contact) {
                    reloadContacts();
                  }
                )
              ));
            },
            ...
          );
        },
      ),
    );
  }
}
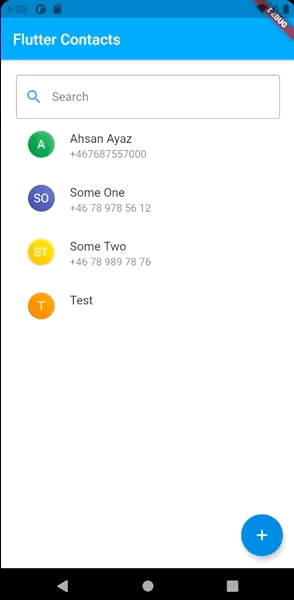
💥 Boom! Now if you delete a contact, you should see it working as a seamless and quick user experience.
Conclusion
ContactsService is an amazing flutter package to work with. It makes it really easy to work with the Native Phone Contacts directory. This implementation was just a barebone of what's possible with the package and a bit of love 🖤. And I hope that you've learnt the most easiest ways of working with the native contacts within a Flutter app.
You can always share what you build after the learnings from this article on my Twitter